

Before You Start
Make sure the following are in place before creating roleplays:
Your organization has at least one active Playbook configured. Roleplays use Playbooks to automatically evaluate performance after each session.
You have reviewed the available Personas under Settings → Personas so you know which AI customer characters are available to use.
You have identified the training situations you want to build. Each unique situation should become a Scenario.
Creating a Scenario
A scenario is the training situation your representative will practice. You build your own library of scenarios in Score, tailored to the issues and interactions your team encounters most.
Opening the Scenario Modal
You can create a scenario from two places:
From the Roleplay page, click View Scenarios, then click Create Scenario
During the roleplay creation wizard (Step 1), click Create Scenario inline without leaving the flow
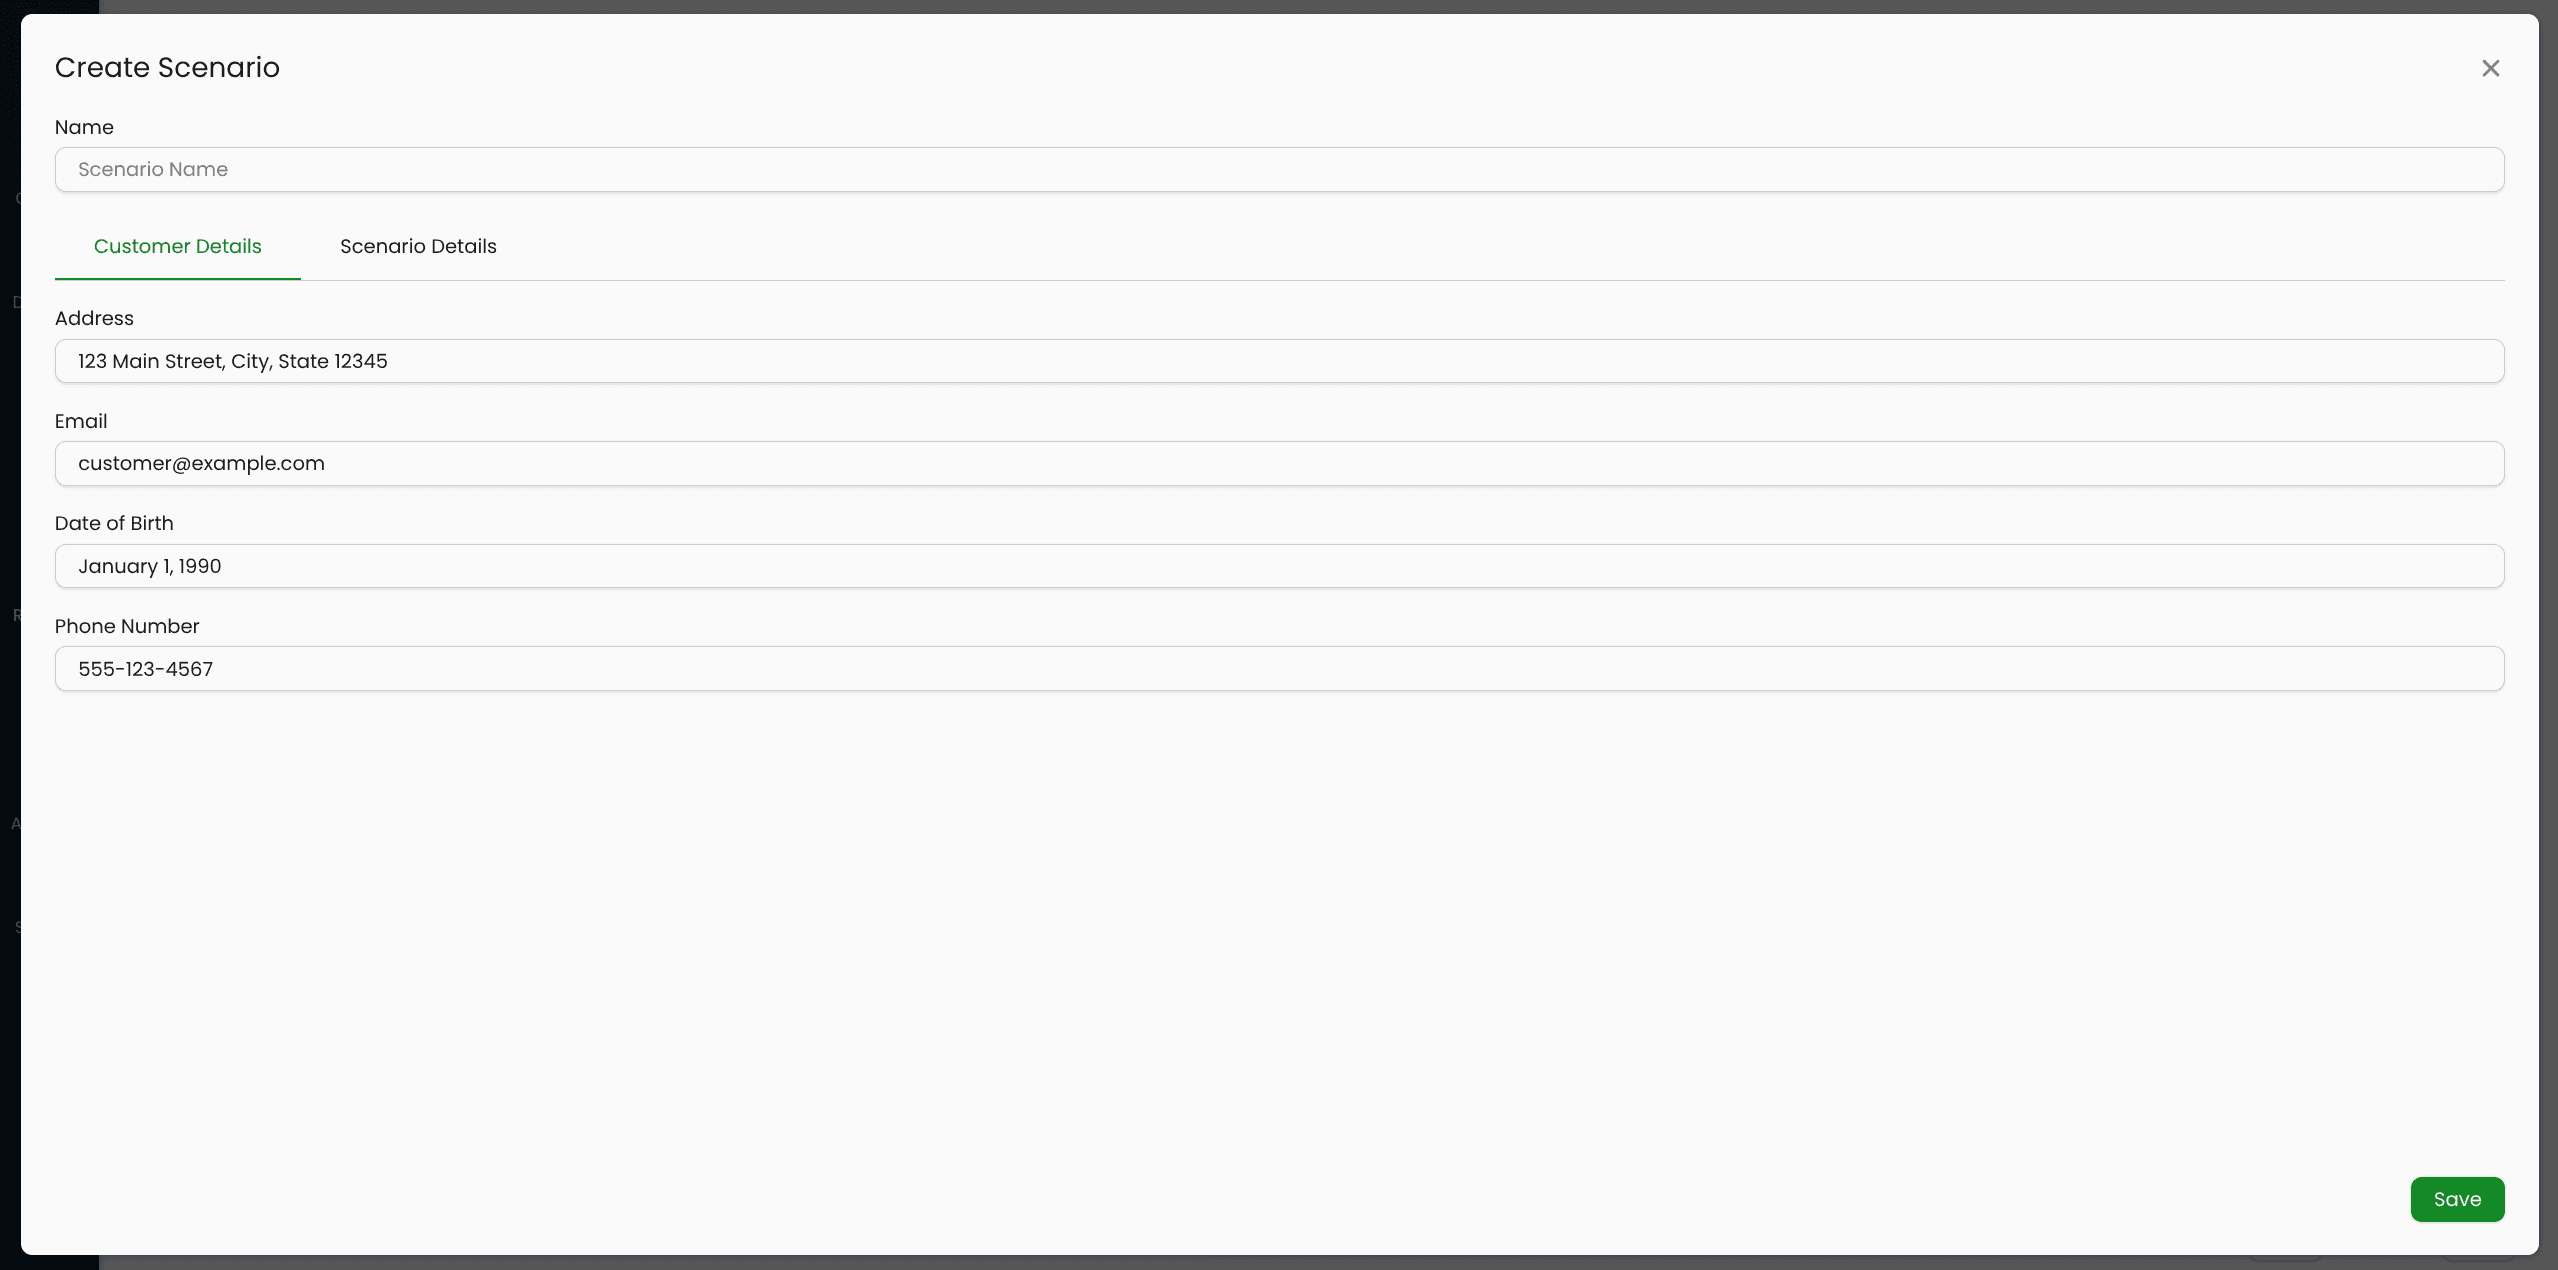
Filling in the Scenario
The scenario form has two tabs: Customer Details and Scenario Details.
Name
Give the scenario a descriptive name so it is easy to identify in the dropdown later. Examples: "Billing Dispute — First Contact", "Return Request — Expired Window", "Account Locked — Urgent".
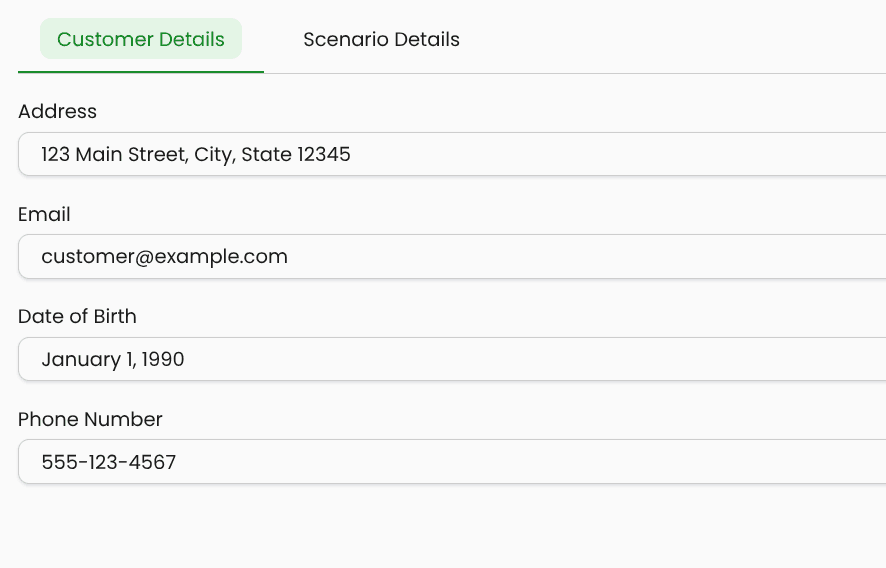
Customer Details tab
These fields define the fictional customer the AI will play. They are used to keep the AI in character if the representative asks for personal information during the conversation.
Field | Description |
|---|---|
Address | The customer's home or billing address |
The customer's email address | |
Date of Birth | The customer's date of birth |
Phone Number | The customer's contact number |
All fields are optional. Fill in only the details that are relevant to your scenario or that your representatives are likely to ask for.
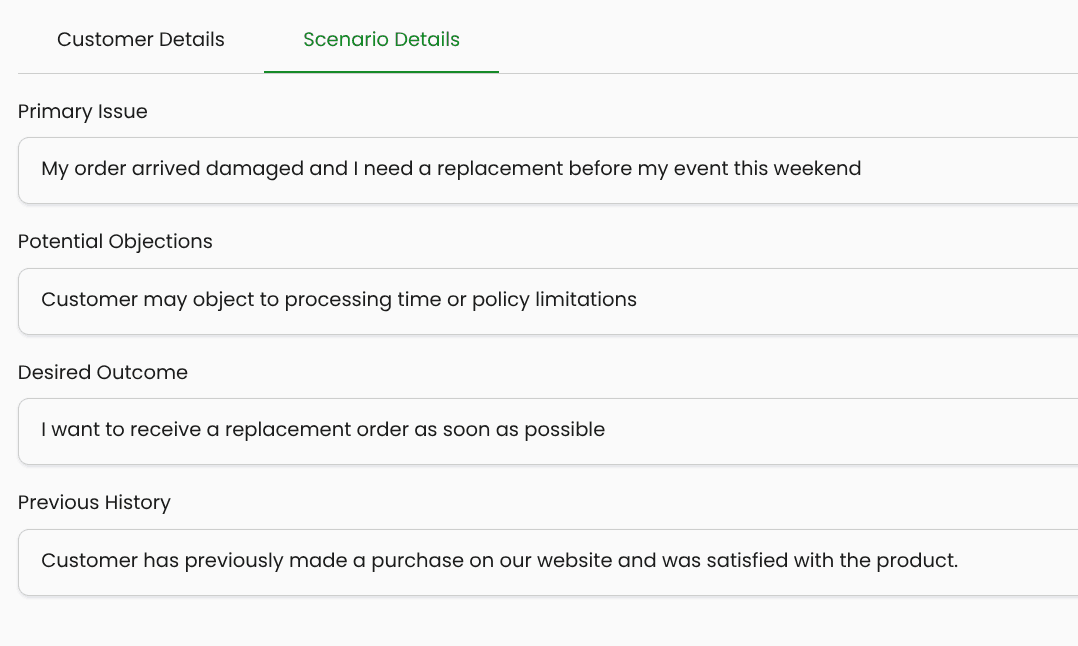
Scenario Details tab
These fields define the training situation itself. They are used to instruct the AI on how to behave during the conversation.
Field | Description |
|---|---|
Primary Issue | The main problem or reason the customer is contacting support. This is required. |
Potential Objections | Objections or pushback the AI should raise during the conversation (e.g., "I already tried that", "That's not acceptable") |
Desired Outcome | What the customer wants to achieve by the end of the conversation |
Previous History | Any relevant prior interactions or context the AI should reference |
Tip: The more specific the Primary Issue and Desired Outcome are, the more realistic and useful the roleplay will be. Vague scenarios produce vague AI behaviour.
Click Save to create the scenario. It will immediately be available for use in roleplays.
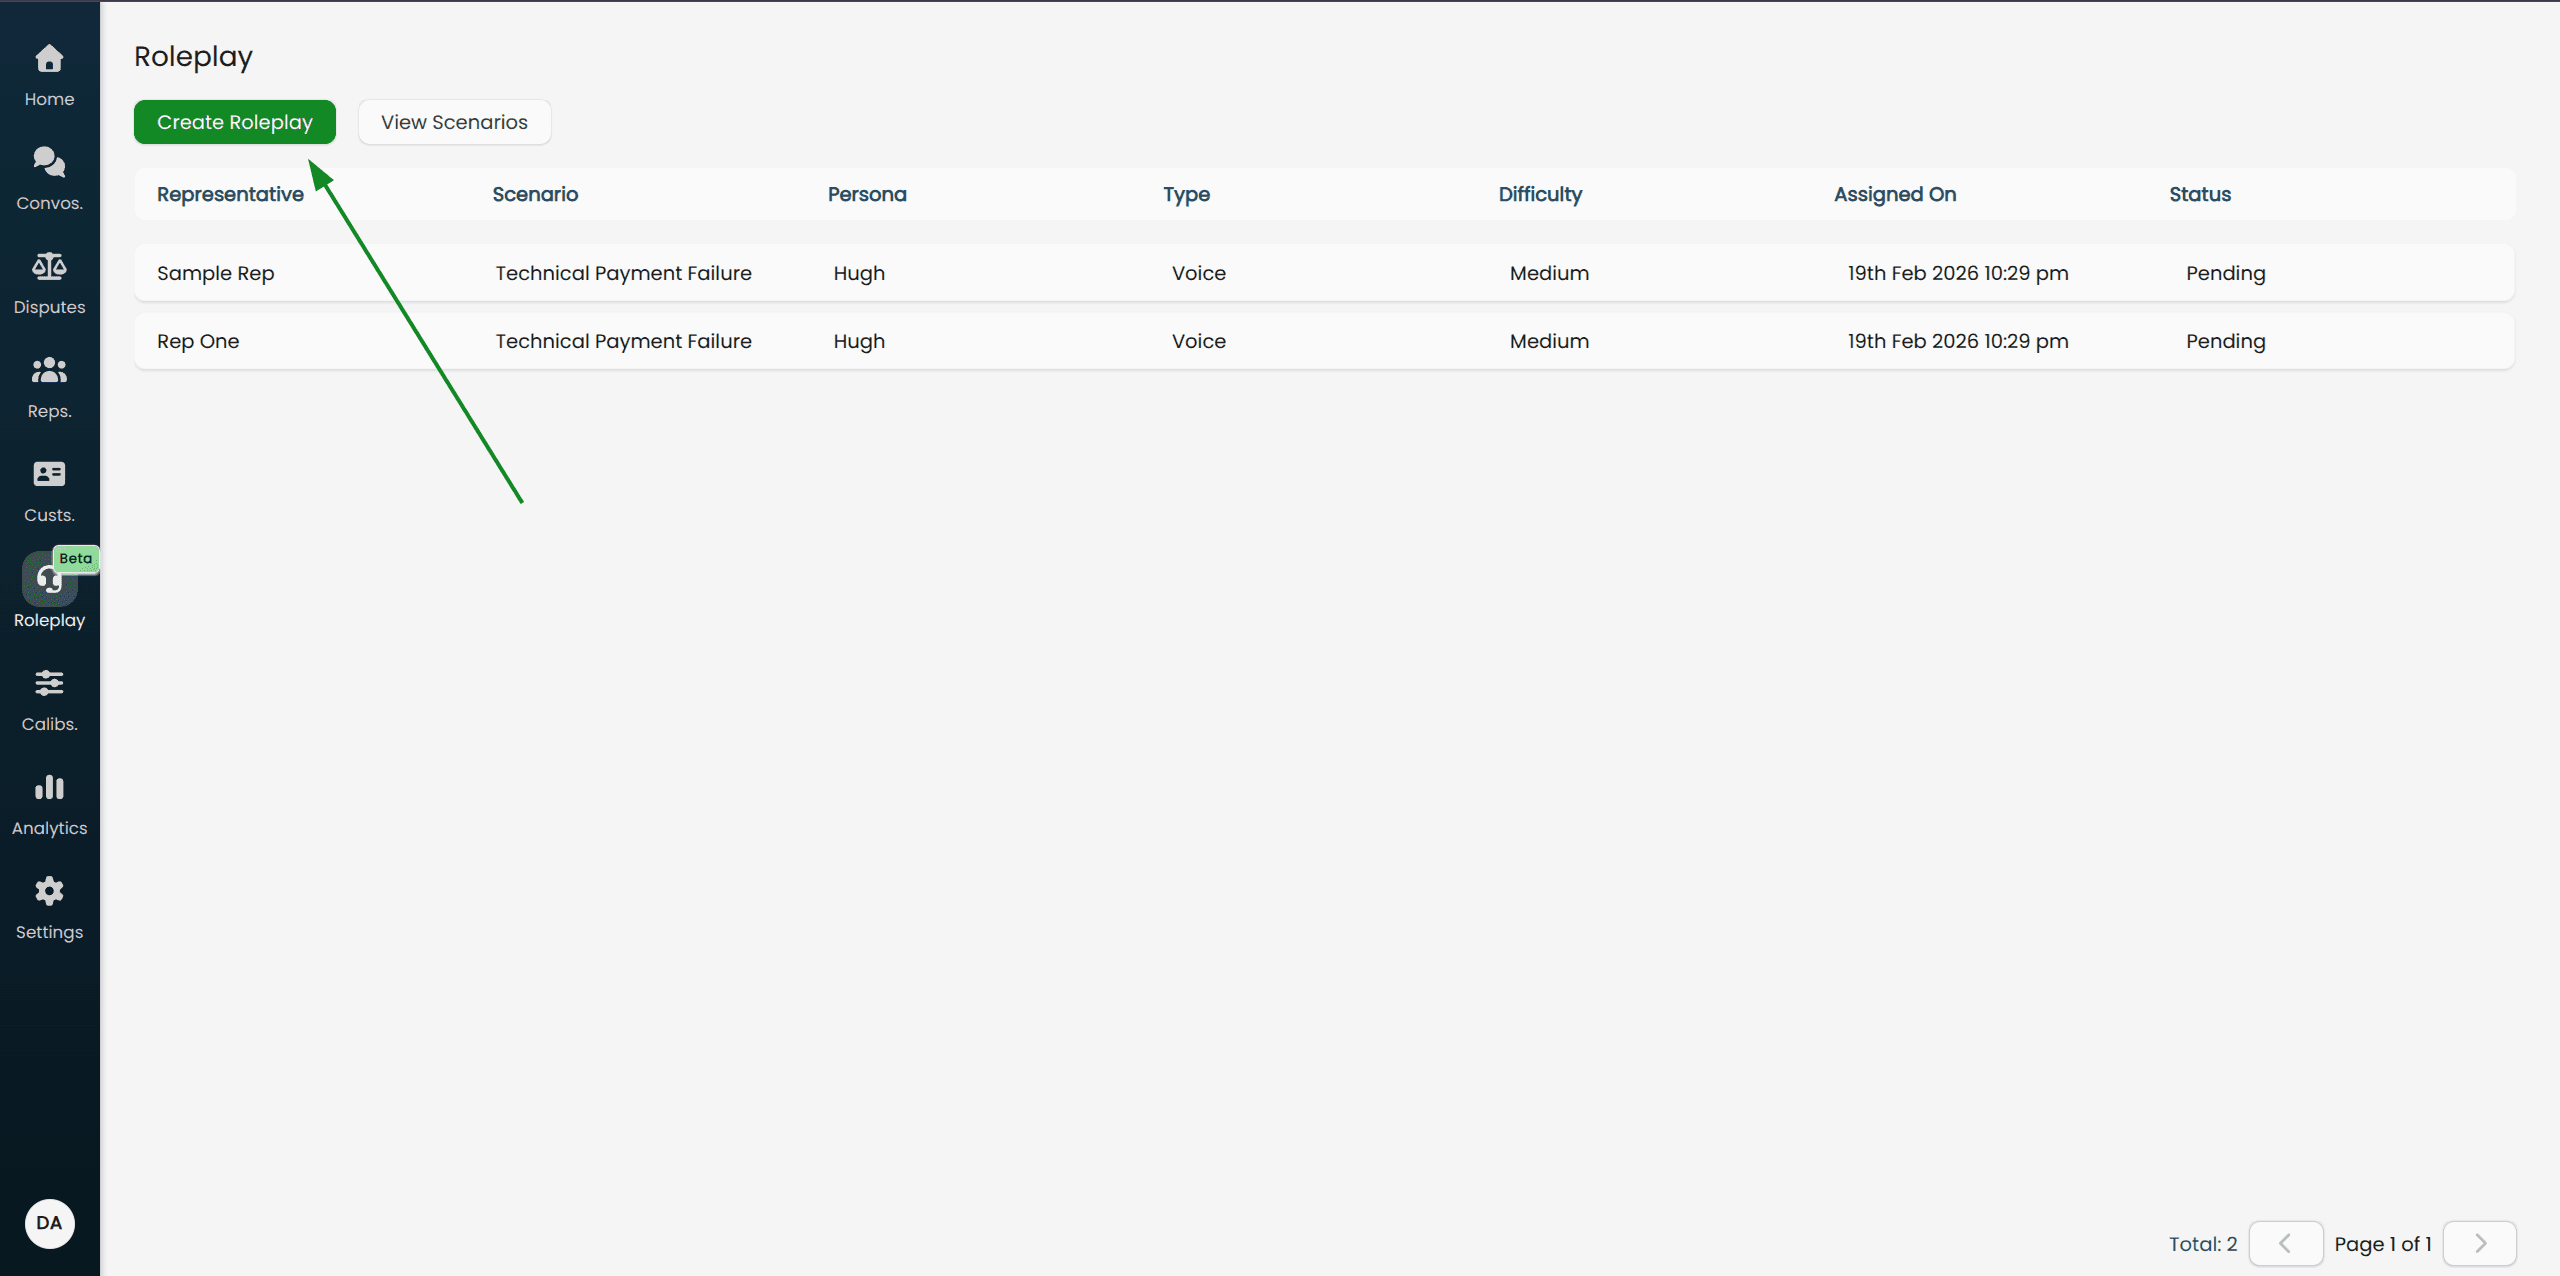
Creating a Roleplay
Navigate to Roleplay in the main menu and click Create Roleplay. This opens a three-step wizard.
Step 1: Setup
This step configures the roleplay itself — what kind of conversation it will be, what the situation is, and how performance will be measured.
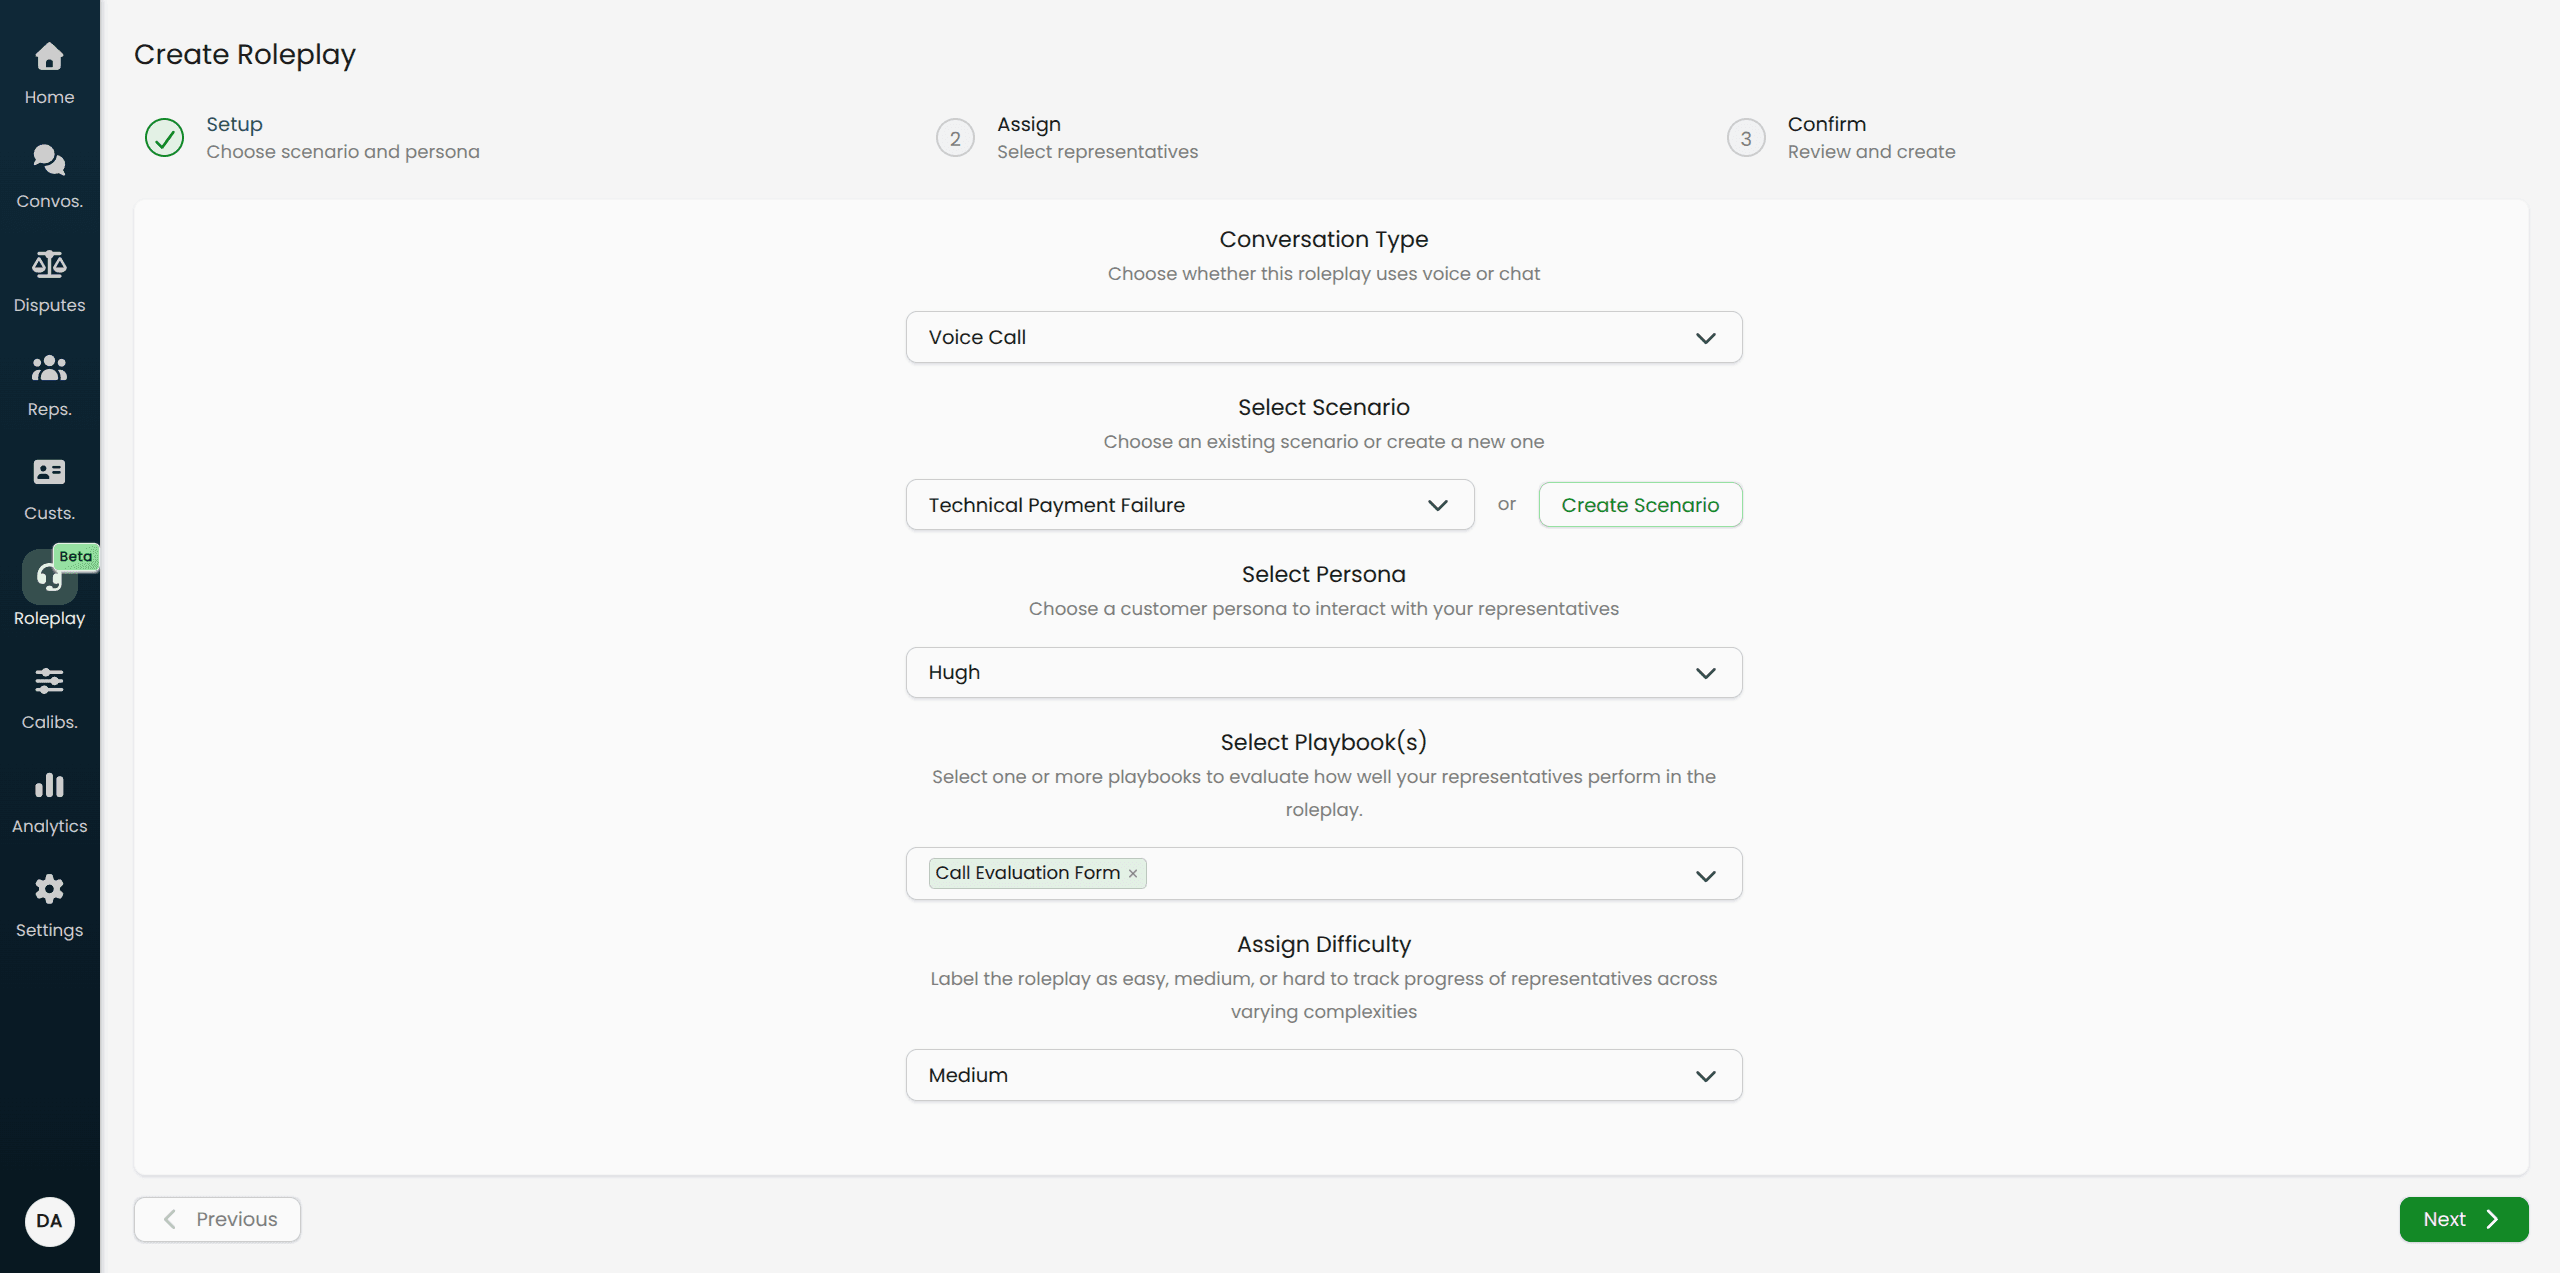
Conversation Type
Choose how the representative will interact with the AI:
Voice Call: Real-time voice conversation over the representative's microphone. Use this for teams handling phone or voice support.
Text Chat: Text-based conversation in a chat interface. Use this for teams handling live chat or messaging support.
You can create separate roleplays for the same scenario using both types if your team handles multiple channels.
Select Scenario
Choose an existing scenario from the dropdown, or click Create Scenario to create one inline without losing your progress in the wizard.
The dropdown supports search — type part of the scenario name to filter the list.
Select Persona
Choose the AI customer character from the dropdown. Each option shows the persona's name and a brief description of their personality.
Browse Settings → Personas beforehand if you are unsure which persona best fits your scenario.
Select Playbook(s)
Choose one or more Playbooks to evaluate the representative's performance. After the roleplay ends, the AI will score the conversation against every selected Playbook automatically.
You must select at least one Playbook to proceed.
Assign Difficulty
Set a difficulty label for this roleplay: Easy, Medium, or Hard. This label is for tracking purposes — it helps you monitor how representatives perform across varying levels of complexity over time. It does not change how the AI behaves.
Click Next when all five fields are filled in.
Step 2: Assign
Select the representatives who will participate in this roleplay.
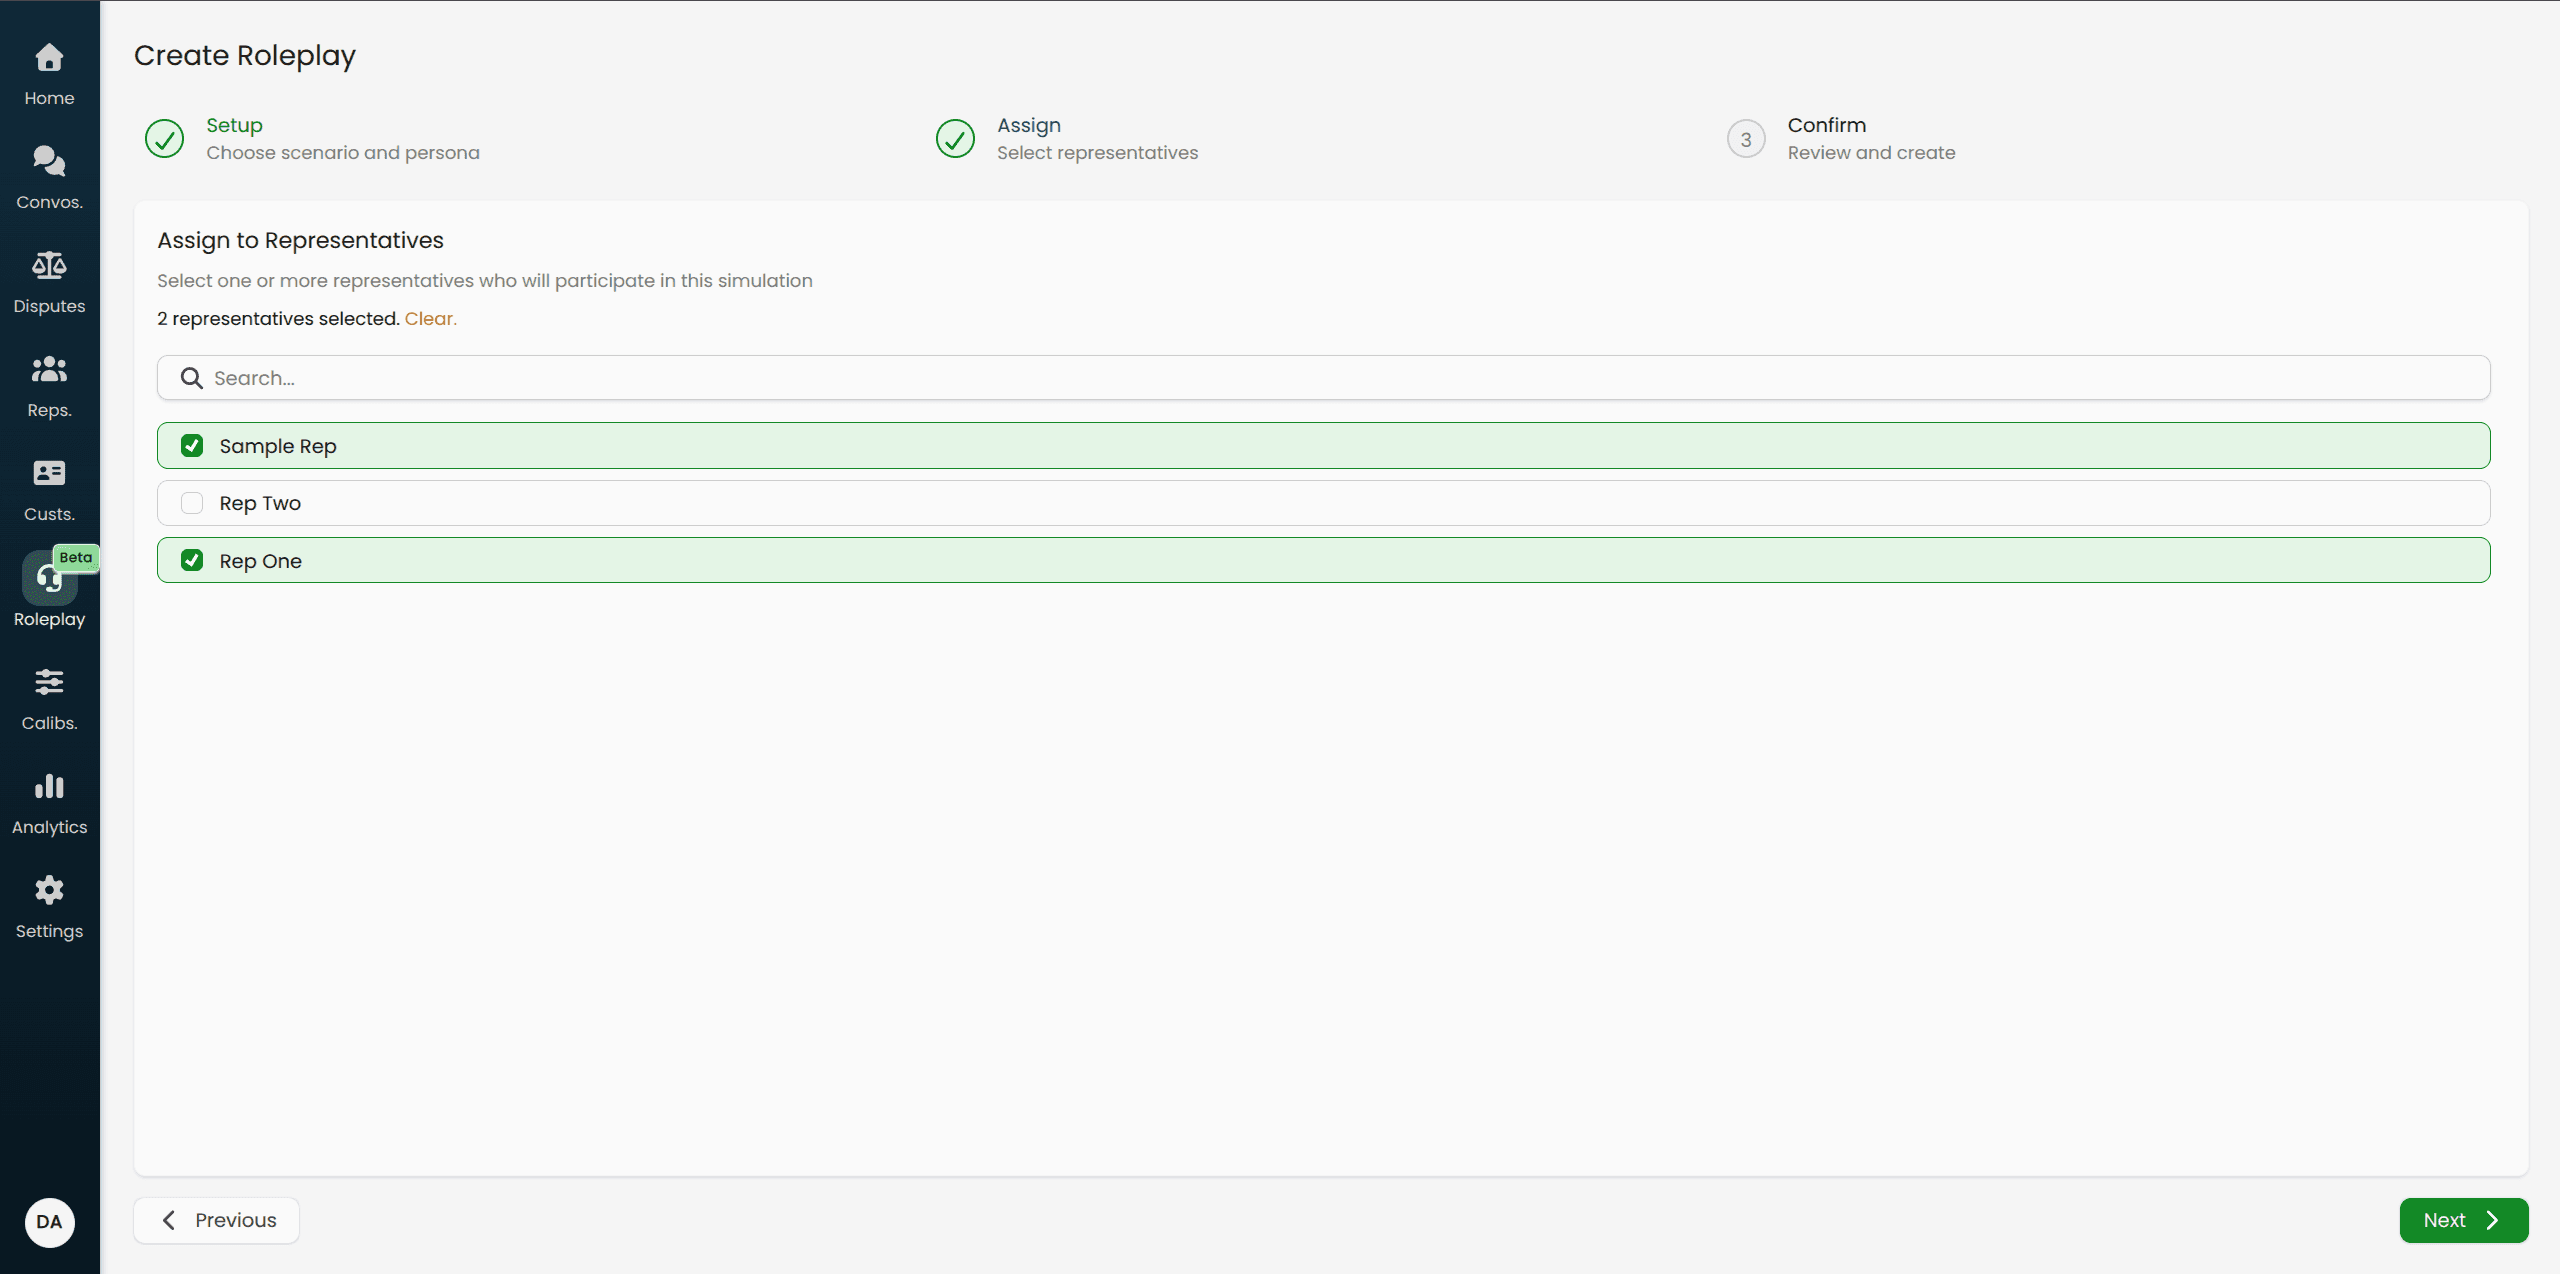
Use the search bar to find representatives by name
Click a representative's row to select them (the row highlights in green when selected)
You can select multiple representatives at once
Note: One roleplay is created for each selected representative. If you select four representatives, four separate roleplays are created — each using the same scenario, persona, playbooks, and settings.
Click Next when at least one representative is selected.
Step 3: Confirm
Review everything before creating. This step shows a summary of the scenario, persona, and all selected representatives.
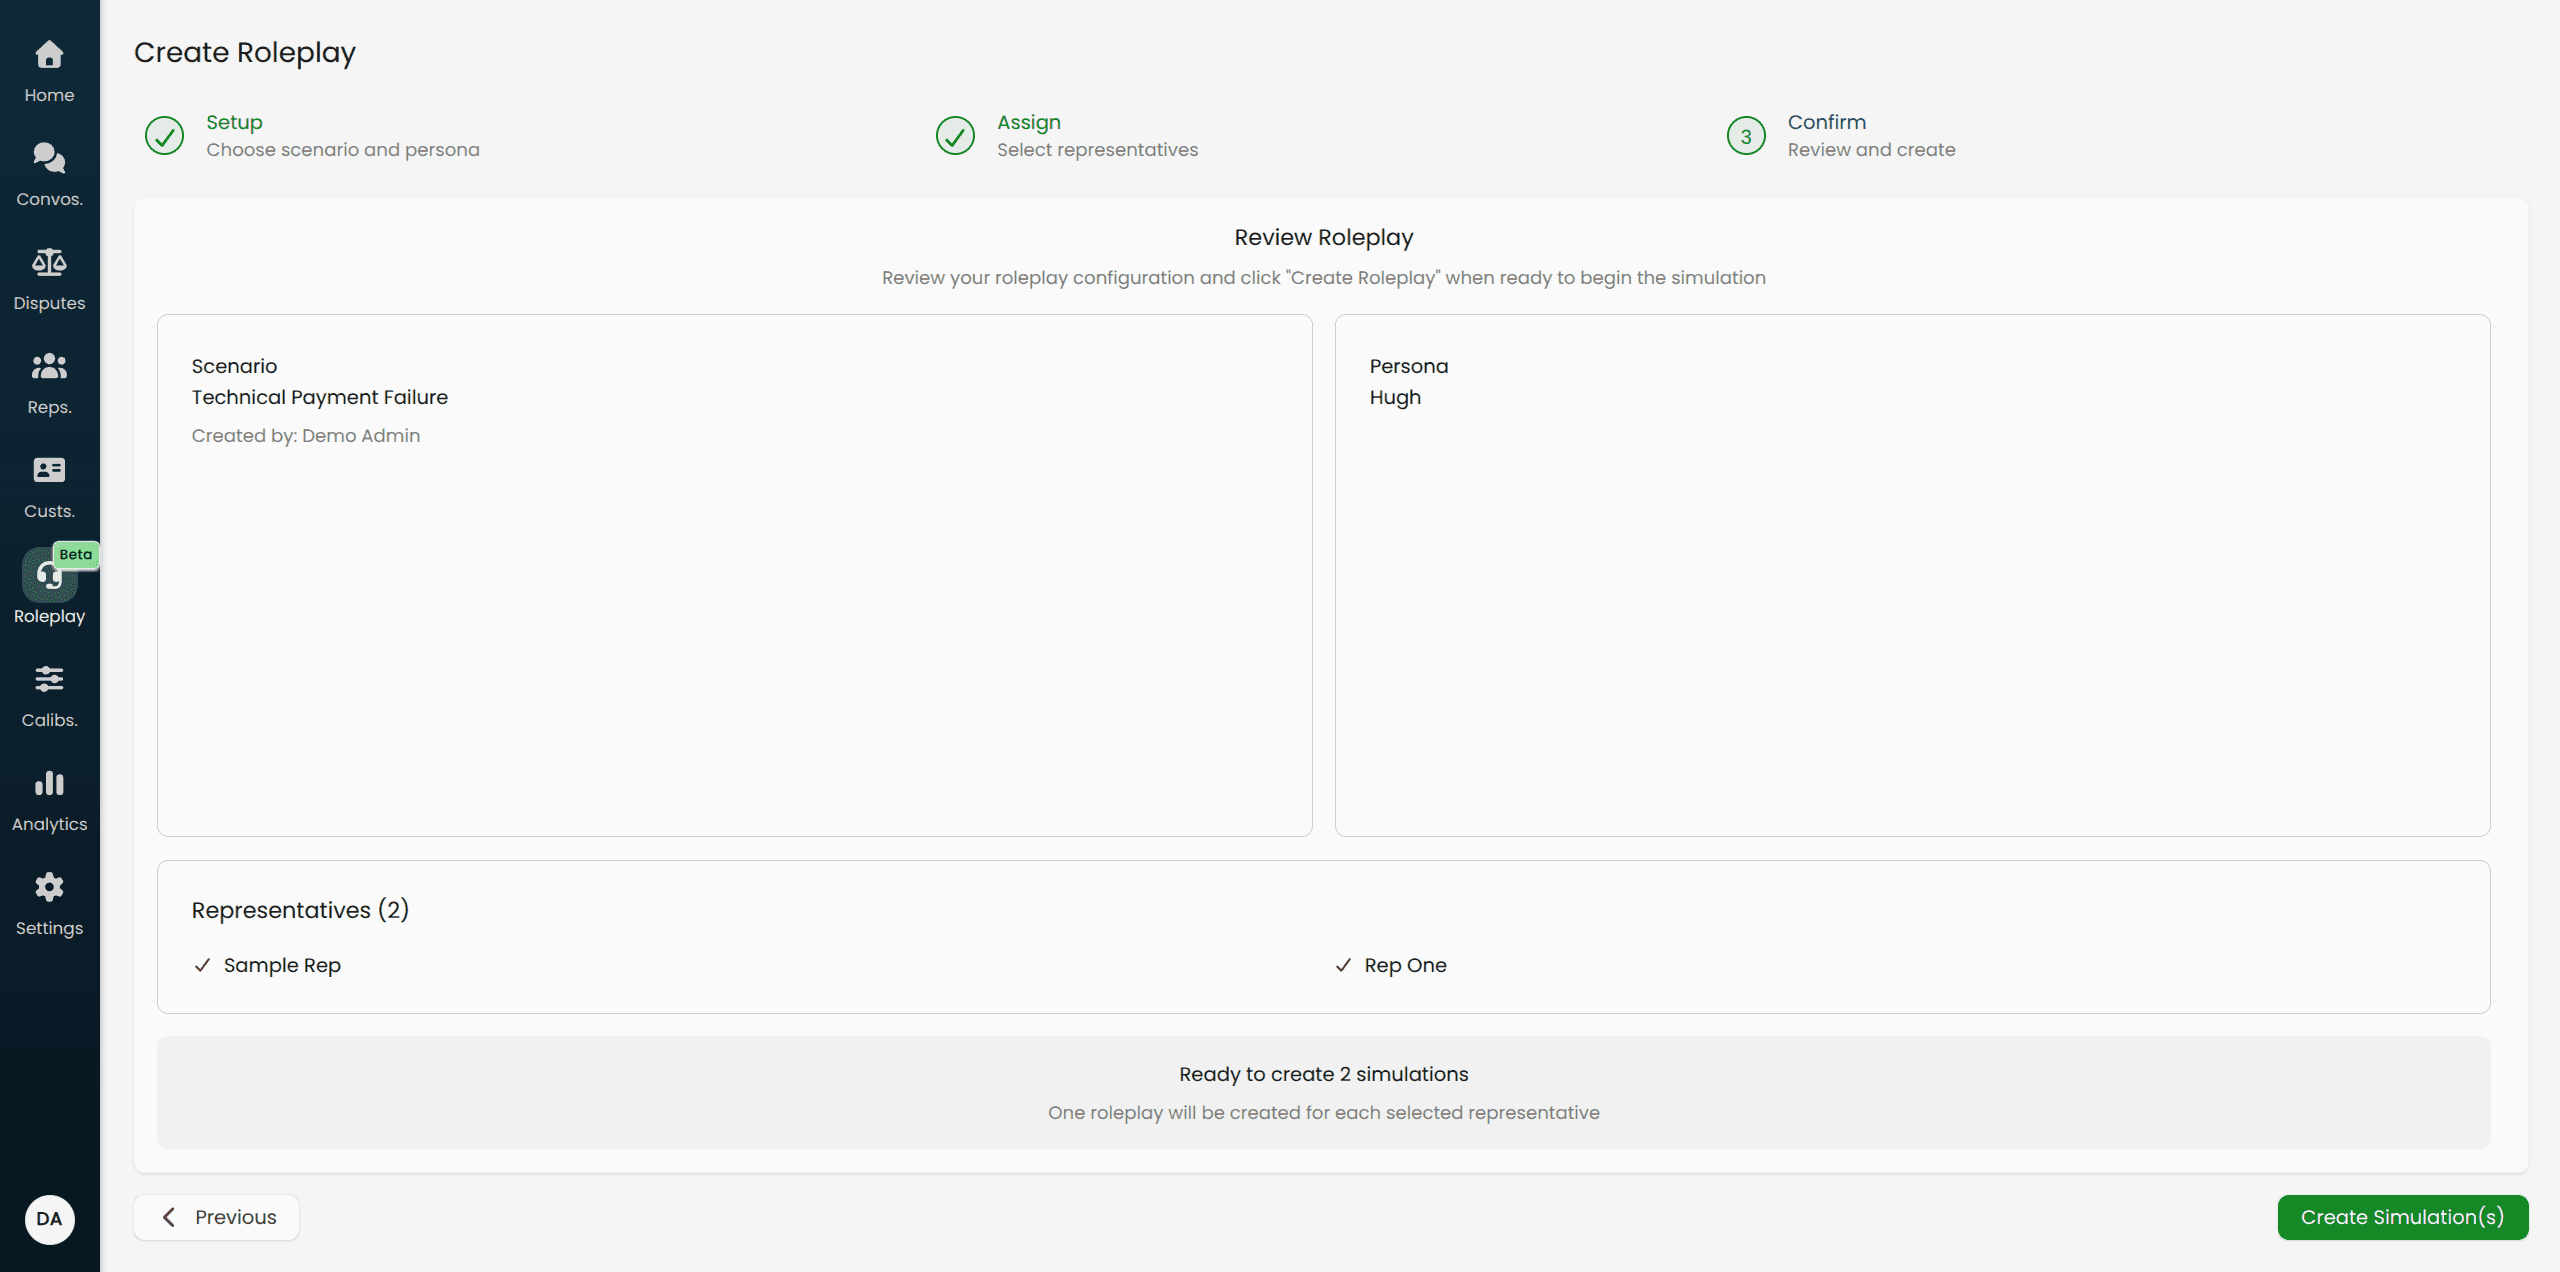
If anything looks wrong, use the Previous button or click a completed step in the progress bar at the top to go back and make changes.
When you are satisfied, click Create Simulation(s). The roleplays are created immediately and each representative's row appears in the Roleplays table with a Pending status.
After Creating a Roleplay
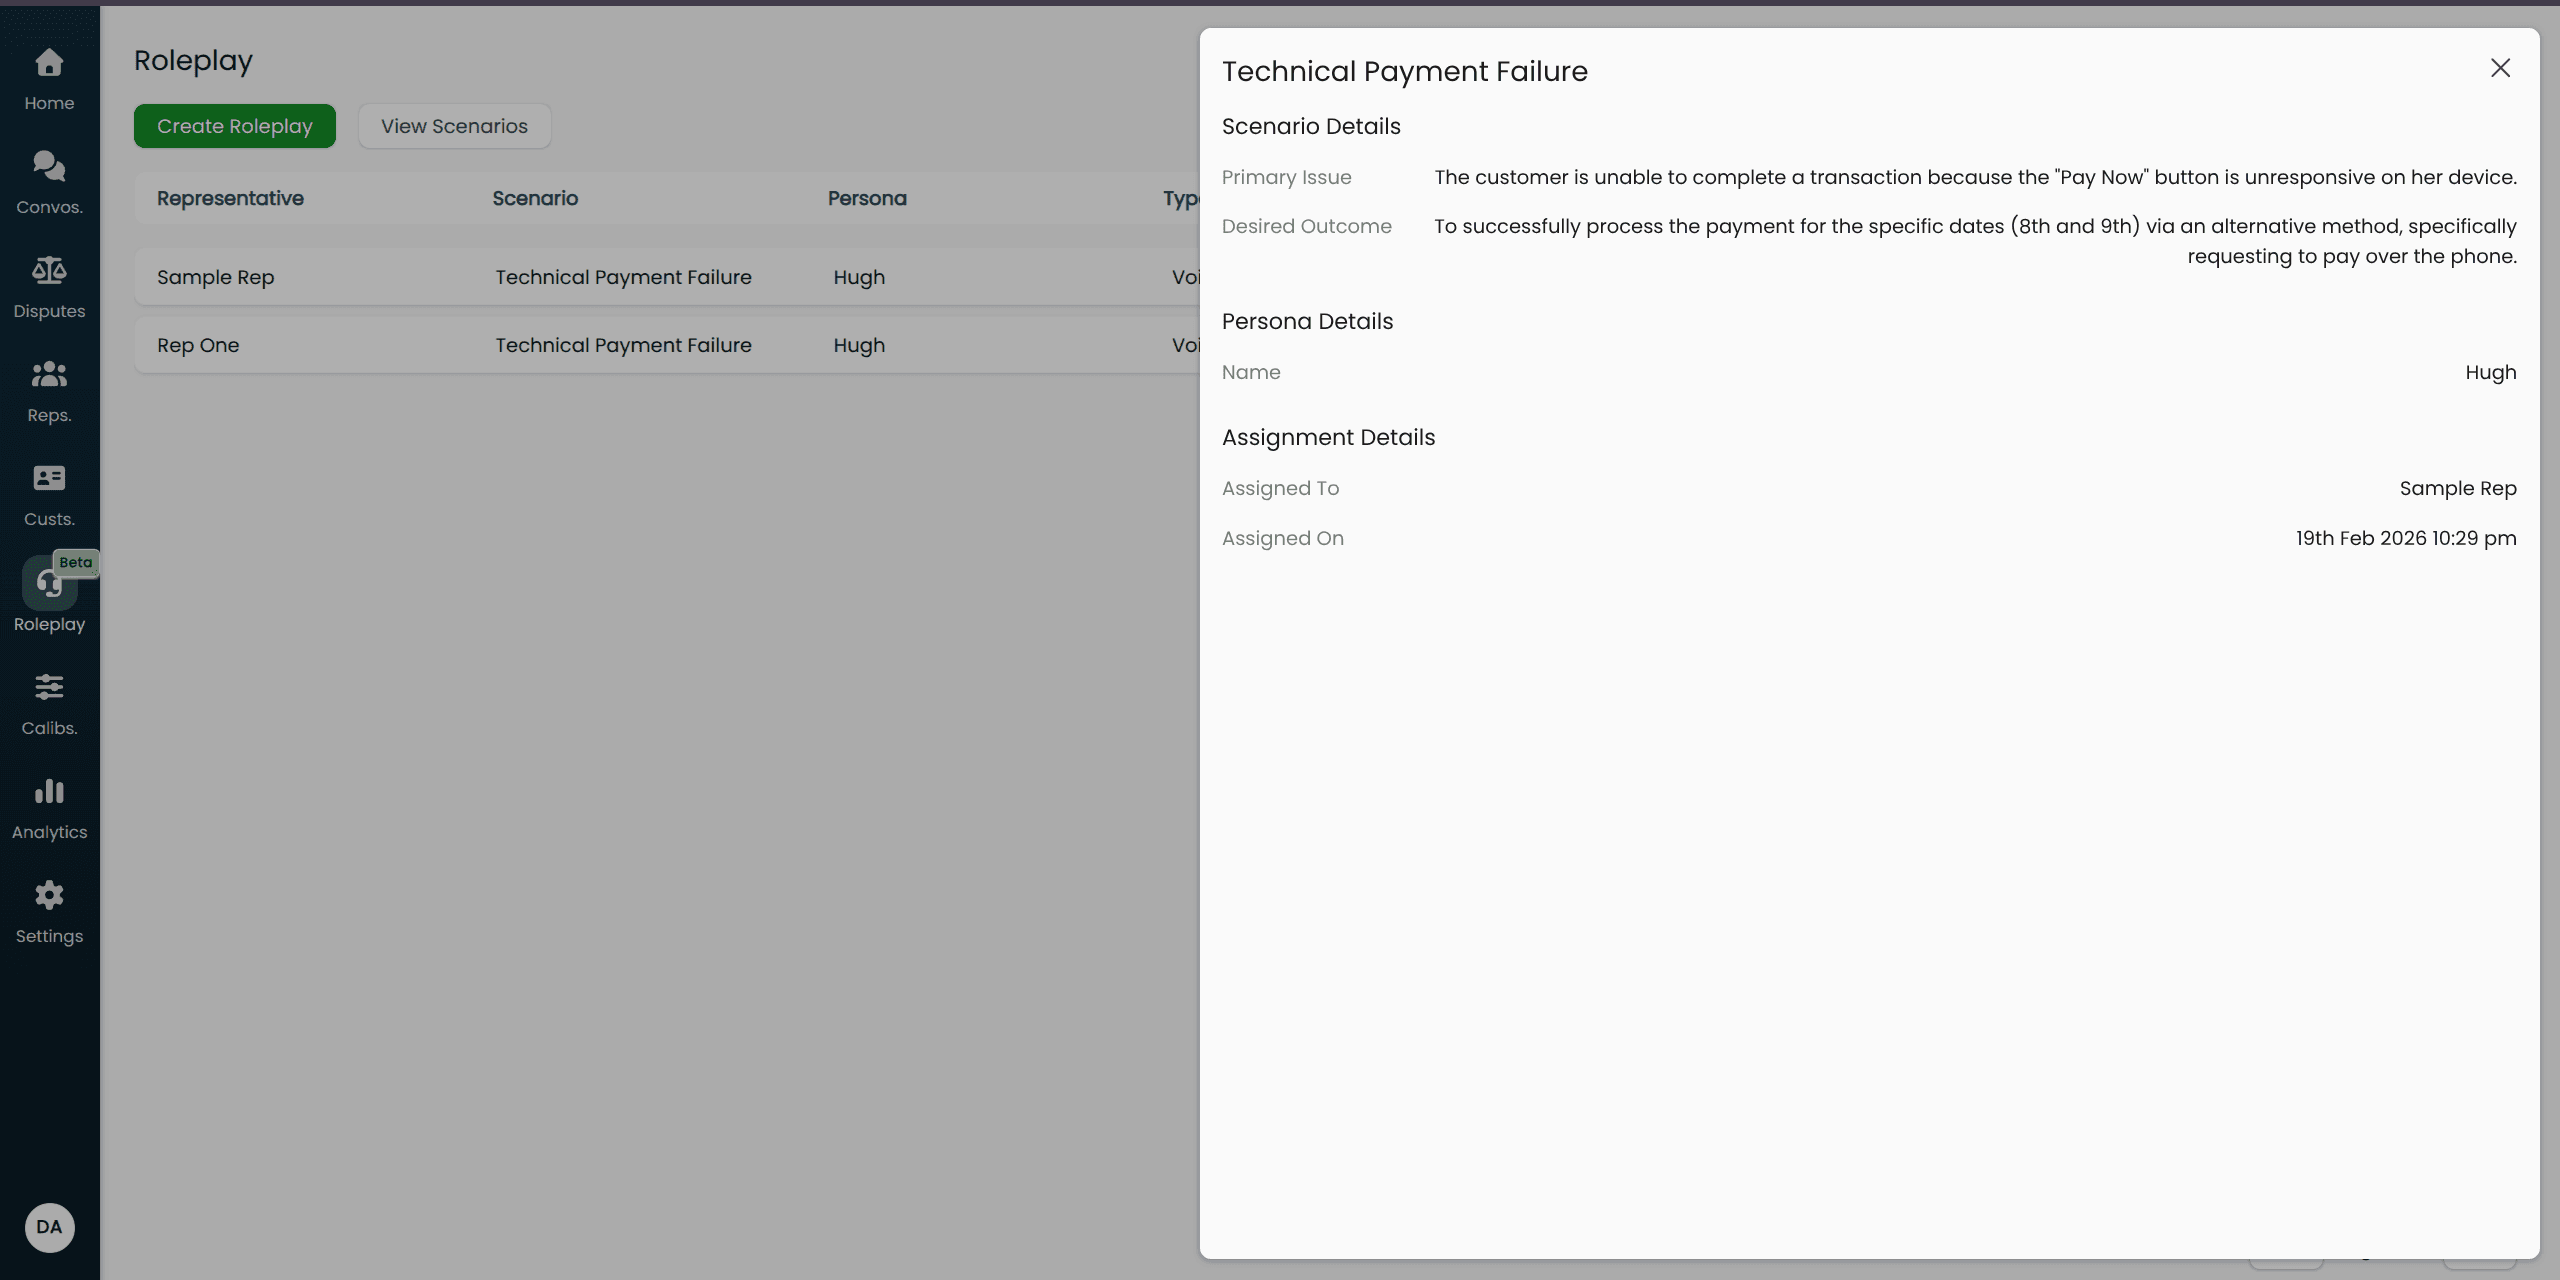
Once created, each roleplay appears in the Roleplays list with a Pending status. The representative can see it in their own Roleplay list and start it when they are ready.
You do not need to notify representatives manually — they will see the new entry when they next visit the Roleplay page.
While a roleplay is pending, clicking its row as an admin opens a detail panel showing the scenario and persona used, who it was assigned to, and when it was created.
Playbook scores become available after the representative completes the conversation. Results are processed automatically — there is nothing you need to do to trigger evaluation.
Tips for Designing Good Scenarios
Focus on your most common pain points. Start by building scenarios around the issue types that generate the most QA failures or the most coaching conversations with your team.
Be specific with the primary issue. "Customer wants a refund" is harder for the AI to work with than "Customer is requesting a refund for an item delivered 45 days ago, beyond the 30-day return window, and is frustrated because they were on holiday."
Use potential objections to increase realism. Real customers push back. Adding 2–3 realistic objections forces representatives to practise handling resistance, not just the happy path.
Match the persona to the scenario. A straightforward billing question paired with an aggressive persona creates a useful challenge. Pairing the same scenario with a calm, easy-going persona creates a different (also valid) training exercise. Build both.
Use difficulty labels consistently. Decide on a team-wide convention for what Easy, Medium, and Hard mean in your context and stick to it. This makes difficulty-based performance tracking meaningful over time.